
Final Evaluation
This unit was probably one of my favourites as it was my FMP (final major project). The reason it’s my favourite unit is because I can photograph anything I want. I chose to do graffiti as I felt like it would be an interesting subject as I could talk about how some graffiti is considered street art whereas other types of graffiti is just delinquent and done because they want to go against the rules. I consider street art as pictures painted onto walls, or even shapes with lots of colour. I consider delinquent graffiti as words or phrases that could either be inappropriate words or simple lines with no relevance. I wanted to be able to use different techniques in my work to show the different forms of graffiti.
For this unit I had to complete seven experimental shoots, at least three had to be conceptual and another three had to be technical. I then had to do a final shoot and I also had to complete six research pieces about artists or photographers, I again needed to make sure that three of the research pieces were conceptual and another three were technical based. I had to complete a case study as well, for this case study, I travelled to Suffolk and visited a graffiti exhibition. At this exhibition I was able to gather a lot of information about some artists and the reasoning behind their work. I also had to complete a mood board and mind map, which includes some initial ideas of what I would like to do for my FMP. For my research, I found three artists who do the graffiti themselves, such as Banksy and three photographers who photograph the graffiti or people doing graffiti, such as Alex Fakso.
I started off this unit by writing my own brief, it explains what I’ll be doing during this unit, when I’ll be doing it and how I’ll be doing. Once I had completed my brief I had to do two pro formas, which included my ideas and the meaning behind my work and what I’ll be doing to complete the unit. My ideas were to show the different ways people try to express themselves, such as graffiti artists, they may do graffiti to either show their love for art or to show their love for art to other people as the artists want others to appreciate it. However, other people may do graffiti the more illegal way which is doing it either in a group due to peer pressure or their feel that they need to express themselves in a rebellious way so they can put a point across to the authorities that they can’t be caught or the fact that they can do anything they want, which in my opinion gives them a sense of freedom and makes them feel dominant. I wanted to be able to photograph street art graffiti which is professional and just plain graffiti which is done illegally. Although technically all graffiti is illegal, street art is deemed acceptable as you’re less likely to want to cover up a piece of art that a bit of graffiti that is inappropriate or just scribbles on a wall.
Throughout this unit I have completed seven experimental shoots. Each of my shoots have been different, however some of the images in two shoots have been fairly similar but the techniques were no the same. My experimental shoots consisted of three conceptual pieces, one was to take pictures at my local skate park as there is a lot of graffiti on the ramps. Although when I evaluated that shoot I said how that kind of graffiti was delinquent, however it can also be seen as artistic as a group of people have come together and graffitied cartoons of animated characters skateboarding, the skate park is also a secluded area so its not on display for the public to see. Another one of my conceptual shoots consisted of me going to the old Passmores Academy site, as the previous students and teaches that attended had done their own graffiti on the wall outside their school. The wall was built solely for the purpose to be painted, I liked how the students and teachers came together and painted on the wall as it made the relationship closer between them all and they also were able to promote their school as it could be seen from a very far distance so it drew people in. All my other experimental shoots were all technical based, I used Photoshop for some as I did my own graffiti in on shoot, I then took a picture of a wall and photoshopped my own graffiti onto the wall. I did this shoot next to college at the bus station as I thought the walls around there were quite dirty and rustic which matched my idea for the graffiti really well. I also did a shoot where I experimented with different forms of black and white so I used one image of graffiti and used different black and white filters in photoshop, I took these images again in my local skatepark as there was one piece there of a cartoon character skateboarding which I mentioned before, I found this one piece very interesting as it fit in with skatepark perfectly. I also printed out two pieces of graffiti and stuck buttons around the lettering to make it a 3D shoot, I took these images around staple tye as the graffiti around there was quite simple so it made it easier for me to stick the buttons round the letters. I also completed a shoot about depth of field, however after shooting the depth of field shoot I realised that although attempting to use the technique, I didn’t do it to a good enough standard as the background was too close to the in focus part so it wasn’t blurred out enough. The reason this happened was also down to not using the correct aperture setting as i needed it to be down to 3.5 and to also have my camera zoomed out to 18mm. If i had done this then I would have gotten my desired effect. If i were to do this shoot again, I would pick a different location where the background next to the graffiti is further away and I would also make sure that my camera settings are correct.
For each of my research pieces I had to make a mood board of responses. For example, I researched Bansky who does quite political graffiti and shares real life issues through his/her work. I then went onto the internet and researched political graffiti and political headlines, this was then made into a mood board as added it to my research. I did this for al six of my research pieces. Along with the responses, I had to make image based solutions. I only chose to do four image based solutions as some of my researched artists/photographers had similar ideas but different techniques so I felt that if I had done all six, some of the solutions would have looked too similar. I enjoyed doing my images based solutions as I had to create an image that I thought represented my artist/photographers work. For the images based solutions, I was allowed to use my own images or someone else’s. For example, Banksy again, I found a plain brick wall and a piece of political graffiti in a white background. I then photoshopped the graffiti onto the brick wall and blend it in.
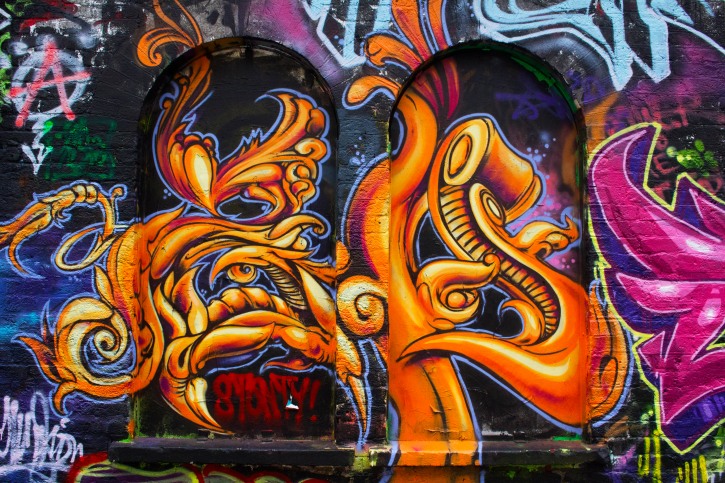
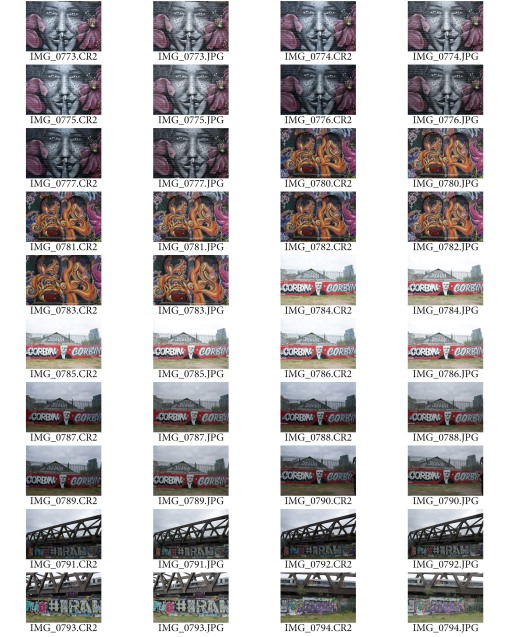
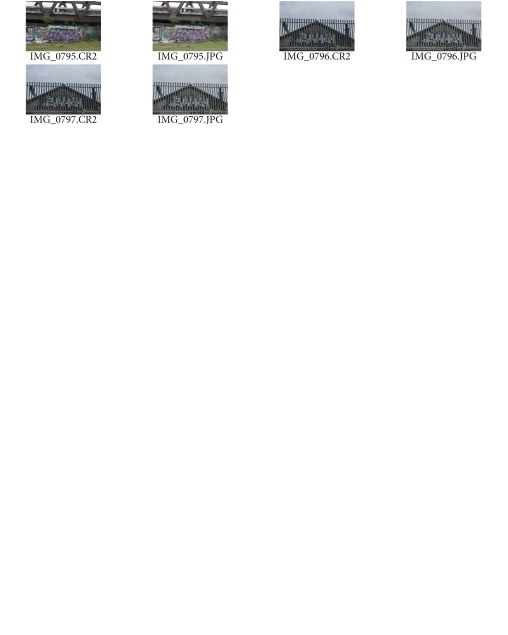
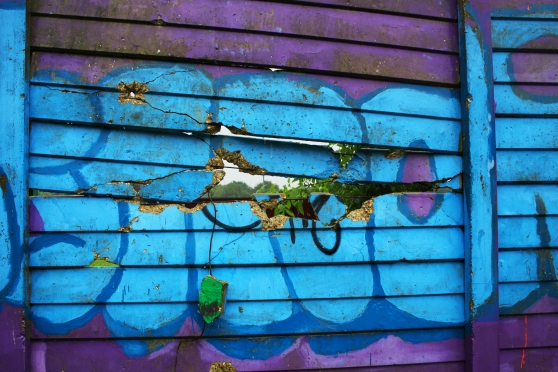
After doing al my experimental shoots, artists responses and image based solutions, I had to do my final shoot and final image. To do this I wanted to find a place that has amazing street art, which led me to go to Brick Lane in London. I took the train up there which didn’t take long, however once I had gotten there I couldn’t find a lot of graffiti. However once I had walked a bit further down Brick Lane, the graffiti was everywhere on every wall. Alley ways were covered from top to bottom in graffiti, it was fantastic. I managed to take over 400 images as there was just so much to photograph. I was hoping to maybe see a piece of work by Banksy, however I wasn’t able to find anything unfortunately but nevertheless i found some amazing bits of graffiti. I turned down one alleyway and it went from standard graffiti to such an artistic piece, that in my opinion needed to be showcased in a exhibition rather than a wall. I chose my final image once I had gotten home and had a look through all my images. I then edited it in Photoshop as I wanted the colours to be really bright so it stood out. Once my image was fully edited and finished I need to prepare it to be printed. I made sure to save my final image as a PSD (Photoshop) file first so if I needed to edit my image again then I could. I then saved the image again but as TIFF file, after saving it as a TIFF it can no longer be edited. I then went to Boots and printed it off as a poster, the sizing was 20” by 16” which is the exact size I wanted my image.
Throughout the unit, the tasks that I think that have went well would be my 3D shoot which is when I stuck the different coloured and sized buttons on the lettering of the graffiti as even though it was fairly easy to do, it was an effective shoot and it was also very different to anything else I have done before. Another task that I think was successful would be my image based solutions, the reason for this would be that I found it very difficult to work with some of the Photoshop tools as I hadn’t certain tools before, however, after figuring out what tool did what, I was able to get some really good outcomes. Amongst all the things that went well, there were a few pieces that could have been improved. Such as, my depth of field shoot, as I feel that if I knew what settings I had needed and ask the correct scenery, then my images would have come out a lot better and the depth of field shoot would have been a lot more effective.
Originally, in my project proposal, I had planned to complete eight experimental shoots, however due to the similarity of my images I chose to stick with seven as I know that if I had done that extra shoot it wouldn’t have been as good as some of my other experimental shoots.
Overall, this unit has been very successful as I was able to answer my brief on time and also complete all of my work to a good standard. I have also enjoyed this unit as all of the decisions made were made by me, which gave me a sense of freedom and I could change, add or even expand on my work whenever I wanted which allowed me to explore my ideas a lot more than last unit. My whole class has an exhibition on the 19th June, which will showcase all our final pieces and allow friends and family to come and see our work. The exhibition will go on till the 23rd June, which will again allow anyone who couldn’t make it on our opening night to have a chance to see our final pieces of work. We all have set duties to help create the exhibition, for example, I am decorating and painting the boards that our work will be presented on, whereas others are doing marketing, so they will make leaflets and invites for people to come. The whole class have set groups in what they’re doing, however construction and decorating have to be done as soon as possible as the set up team are putting the boards up on Thursday 15th June.
Here is my final image that will be presented on Monday 19th:
Final Shoot
As this shoot was my final shoot, I wanted to make sure the graffiti and the photos were as good as possible. To find this graffiti which in my opinion is more street art, I travelled to London, Brick Lane. I had to get a train there which was included in my expenses for this unit, but it was worth it. Once I had gotten to Brick Lane I struggled to find some amazing pieces, there were a few bits here and there but not what I was expecting to find. However, I was lucky enough to meet a man named Keith who was also photographing the graffiti and he is also a professional photographer. He was kind enough to show me all the graffiti hotspots around Brick Lane, which helped me out a lot as I was able to photograph some amazing pieces and I was able to get a range of photographs. I was working with the manual setting on my camera and depending on the area I was in I had to keep changing my shutter speed and aperture as some places were fairly shaded, so I had to adapt my camera settings to suit the scenery I was in. The graffiti I saw was absolutely stunning and it was clear that the people paint the graffiti are artists trying to express themselves or just to simply express their art to others.
All in all the shoot went very well as I was able to photograph my final image which will be used in my showcase at the end of my unit. It was easy to get to Brick Lane and after bumping into Keith I was able to get some amazing shots. I would love to visit Brick Lane again as the art there is incredible.
Here are my contact sheets, I took over 400 images for this shoot so I have 12 contact sheets.


Case study – The Gibberd Gallery
The Gibberd Gallery is very openly spaced however it has some amazing pieces of work. There are lots of different exhibitions that take place there, such as one exhibition that expresses sculptures. The reason I liked this exhibition is because It’s different compared to pictures just hanging on a wall. However, there is an exhibition at the moment by Noel Dyrenforth who is a Batik artist. The curator and batik collector known as Rudolph G. Smead spoke about what batik is and about Noel Dyrenforth, here is what he said: “Creating art out of hot wax and liquid colour into cloth, otherwise known as Batik, presents a challenge. Yet, Noel Dyrenforth, a leading internationally known artist in this medium, has produced some of the most innovativeand skilled work over the last four decades. His inspired work and teaching pioneered a fresh appraisal of this 2000 year old textile tradition.” The whole exhibition is about the five decades of batik painting. This kind of exhibition wouldn’t be interactive as paintings aren’t usually allowed to be touched, however this is how I would want my own exhibition to be. I would prefer it if my work was set out like this as I think it would be appreciated more.
Here are some images of the Gibberd Gallery:


Final Shoot Plan
For my final shoot I will be going to brick lane to take my final experimental images and one of my final images. I will travel to London by train and then walk over to brick lane. I will take a range of shots at brick lane, but my main focus is my final image. This trip will be used a conceptual piece of work as graffiti will be displayed all over the walls and I will be able to hopefully catch some of bansky’s pieces. I am planning to have at least 2 contact sheets as there will be a lot to photograph as there is a lot of graffiti.
Weekly reflective journal 8
This week I am planning to complete my final shoot plan, my final shoot and my final evaluation.
This week I have completed my final shoot plan, final shoot and my final evaluation. I did my final shoot on Thursday the 8th and evaluated it on the 12th June. I also completed my final shoot plan on the 6th June.
Experimental Shoot 6
For this shoot I am using a 3d effect on my work. I went out and around Staple Tye and found some simple pieces of graffiti. I then picked out a few of my favourites and printed them off in colour, however before I edited them in Photoshop. Once I printed them out I found bits of tissue paper in my arts and crafts box at home, I also found buttons and other pieces which I then stuck onto the graffiti. One of the pieces said ” so I then got tissue paper and stuck it on the letters, however I didn’t want it to be perfect and tidy as I liked the messy effect it has.
Here are my three edited and 3d images:
With these images I originally wanted to use tissue paper as well as buttons, however I thought that having tissue paper and buttons would be too much and it would also be really hard to get the tissue paper in the right place as I printed off the images on a4 paper. I also liked how they’re in black and white as the colourful buttons stand out more. I prefer the second image to the first as in the second one the Brick wall is a lot more visible so it actually looks like there is a background on the image rather than a smooth surface.


Here is my contact sheet which has all of the images I took:

Experimental Shoot 2
For this shoot I went out and found the old Passmores Academy site. Luckily for me before the school was shut down, some of the students and teachers got together and painted the front and back of the wall outside. The wall had school related paintings such as the houses that the students were put into or even a logo that they thought showed their favourite class. Unfortunately it was raining whilst I got these images so it made it a lot more difficult to get these images right, however i had a rain cover for my camera so I was able to keep my camera dry whilst getting my shots. I took pictures of both sides of the wall as there was such a variety of images. I like this kind of graffiti as it isn’t seen as delinquent or even artistic as it isn’t being showcased or famous, but it was done to represent the students passions and activities. This kind of graffiti is done under a controlled environment so all of it is appropriate and supervised. It also shows how students and teachers have come together to create a wonderful piece of work which also shows how this ‘graffiti’ brings people together and have fun rather than for example, doing it to fit in or because they were peer pressured.
I have chosen four images that I thought were my best and have edited them all in Photoshop. For all o these images I used the same techniques and tools for each one. i first opened them up into Photoshop, I then upped the brightness slightly but the contrast quite a bit. I then turned up the saturation and turned the lightness down a bit so the colours were stronger. Here they are:


Here is the contact sheet I created with all the images on:

Experimental Shoot 5
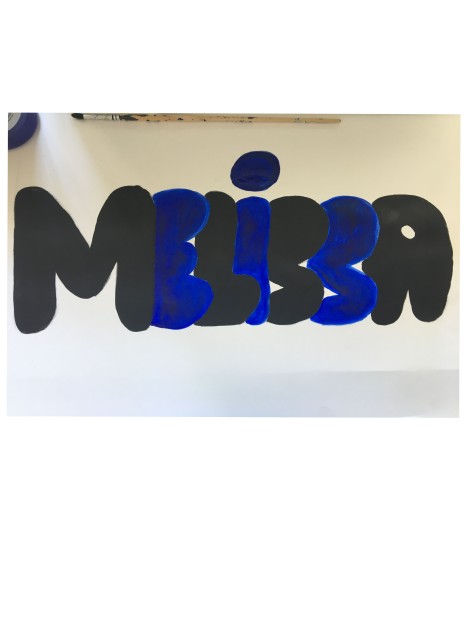
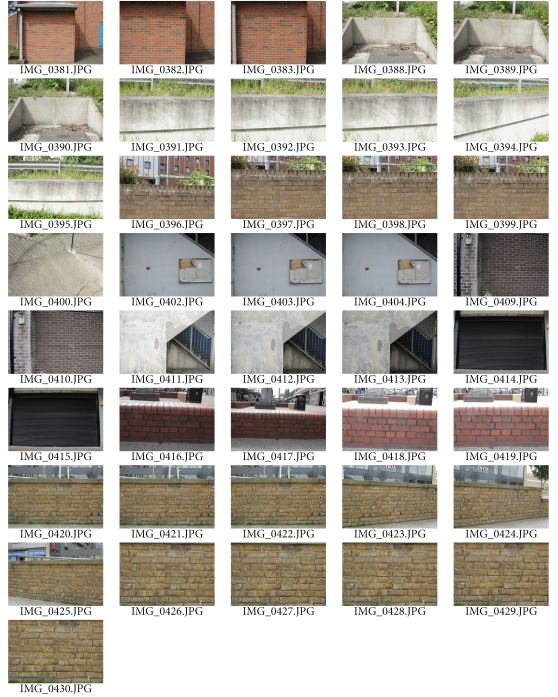
For this shoot, I have created my own graffiti on thick paper/card. This shoot is one of my technical shoots as I have done the graffiti myself and have used photoshop tools to add the graffiti onto the different backgrounds I have photographed. I also had to use different camera settings as I had to adapt to my surroundings. I had to keep changing my shutter speed, aperture and ISO as some of the places I photographed were in the sun and others were in the shade. I have picked two backgrounds to put my graffiti on to. To do the graffiti I got a thick piece of card and traced my name in pencil first and then after that I used acrylic point to fill the letters in.
Here is what I created:
In this image, I opened up the background and the graffiti into photoshop. I used the magnetic lasso tool to go around the graffiti, once I had done this I then dragged the graffiti onto the background. I changed the opacity of the graffiti to about 70%, this way the wall came through slightly which gave it a more realistic effect. I then upped the saturation on the background image so the colours came through a bit more.

I did the exact same thing for this image as the first, however I turned the opacity of the graffiti down to 60% so the background came through even more.

Here is the graffiti I created on its own:
Here is my contact sheet containing the backgrounds I will Photoshop the graffiti on to:
Weekly reflective journal 7
This week I am planning to do my case study and also complete and evaluate my last three experimental shoots.
This week I completed my case study/primary research on the 8th June, I was planning to complete it a little earlier, however I wanted to focus more on finishing my last three experimental shoots and evaluate them which I completed on the 26th May which was my experimental Shoot 5 and my last two I finished on the 6th June.
